 Save
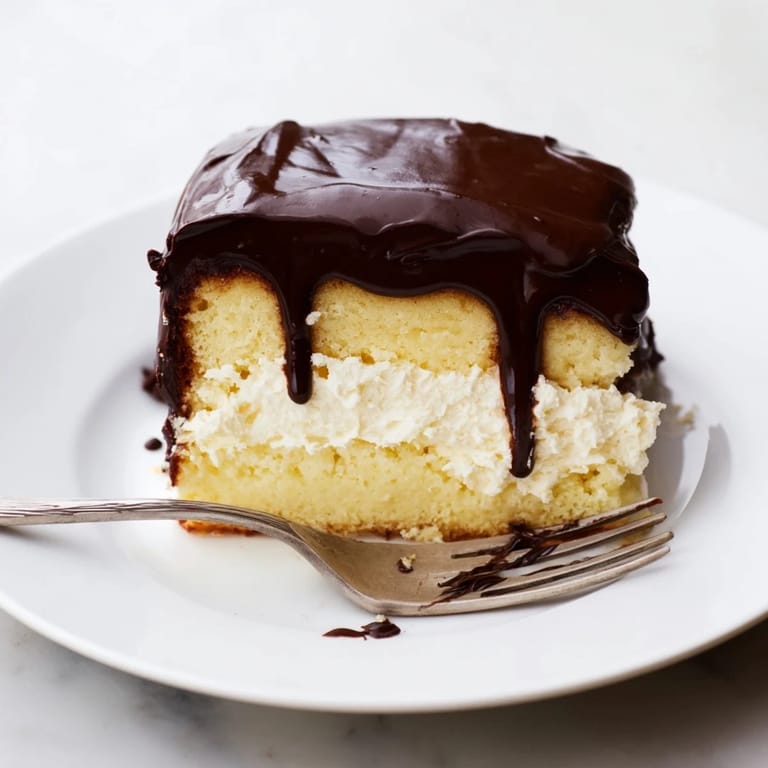
Save There's something about Ho Ho Cake that brings back the exact feeling of Saturday afternoons in someone's kitchen—not mine at first, but eventually becoming mine through repetition and love. My neighbor brought one to a potluck years ago, and I watched people's faces light up when they bit through that dark chocolate shell into the pillowy cream center. I had to ask for the recipe, and what started as copying a note on the back of an envelope became a tradition I'd make for every celebration that mattered.
I made this for my daughter's tenth birthday, and she insisted on helping frost the layers even though her hands were barely big enough to hold the offset spatula steady. When we poured the ganache and watched it cascade down the sides, she declared it looked like a fancy bakery cake, and honestly, she was right—but it came from our own oven, which somehow made it taste better than any store-bought version ever could.
Ingredients
- All-purpose flour (2 cups): The foundation that needs to be whisked with the leavening agents so you don't accidentally overmix once the wet ingredients join in.
- Baking powder and baking soda (2 tsp and 1/2 tsp): This combination gives you lift without an eggy taste, so measure them carefully because baking is a bit science-y here.
- Unsalted butter (3/4 cup for cake, 1/2 cup for filling): Softened butter creams properly with sugar to trap air, making the cake tender rather than dense.
- Granulated sugar (1 1/2 cups): Works with the butter to create that light, fluffy crumb you want in every bite.
- Eggs (3 large): Add them one at a time so they blend in smoothly instead of curdling the batter.
- Vanilla extract (2 tsp for cake, 1 tsp for filling): The quiet ingredient that makes people say this tastes like home, even if they can't name why.
- Whole milk (1 cup): Alternating it with flour keeps the batter from getting tough and ensures a moist cake that doesn't dry out by day two.
- Powdered sugar (1 cup): Dissolves into the filling completely, unlike granulated sugar which would leave a gritty texture.
- Heavy cream (1 cup plus 1/2 cup): The cold cream whips into stiff peaks for the filling, while the heated cream tempers the chocolate for glossy ganache.
- Semi-sweet chocolate chips (1 cup): These melt into the cream without needing to be chopped or heated separately, making ganache foolproof.
Tired of Takeout? 🥡
Get 10 meals you can make faster than delivery arrives. Seriously.
One email. No spam. Unsubscribe anytime.
Instructions
- Prep Your Pan and Oven:
- Preheat to 350°F while you gather everything, then grease that 9x13 pan generously and line it with parchment so the cake releases cleanly without sticking to corners. This takes two minutes but saves you from frustration later.
- Mix Your Dry Ingredients:
- Whisk flour, baking powder, baking soda, and salt together in a bowl so the leavening distributes evenly and you don't taste baking soda pockets. This prevents the dense, bitter spots that ruin an otherwise perfect cake.
- Cream Butter and Sugar:
- Beat them together for two to three minutes until the mixture looks pale and fluffy, like soft frosting—this is where the cake gets its tender crumb. You'll see the color lighten and feel the texture change under the mixer, and that's exactly right.
- Add Eggs and Vanilla:
- Add eggs one at a time, beating well after each one so they incorporate smoothly, then mix in the vanilla. This creates an emulsion that keeps everything blended and prevents curdling.
- Alternate Wet and Dry:
- Start with flour, add milk, then flour again, ending with flour—this gentle method keeps you from overmixing and developing gluten that would toughen the cake. Stir just until you don't see white streaks anymore.
- Bake Until Golden:
- Pour batter into the pan and smooth the top, then bake 25 to 30 minutes until a toothpick comes out clean and the edges pull slightly from the sides. The kitchen will smell like vanilla and butter, and that's when you know it's working.
- Cool Completely:
- Leave the cake in the pan on a wire rack for at least an hour so it sets up enough to handle without crumbling. Patience here matters more than anywhere else in this recipe.
- Make the Cream Filling:
- Beat softened butter and powdered sugar until smooth, then in a separate bowl whip the cold cream with vanilla and salt to stiff peaks. Fold the whipped cream into the butter mixture gently so you keep all those air bubbles that make it light.
- Slice the Cake:
- Once completely cool, run a knife around the edges, flip it onto a cutting board, and use a serrated knife to slice it horizontally into two even layers. Take your time and let the knife do the work rather than sawing aggressively.
- Assemble with Filling:
- Spread the cream filling evenly over the bottom layer, then carefully place the top layer back on so you don't slide off-center. The filling should peek out slightly at the edges, showing what's hiding inside.
- Make the Ganache:
- Heat cream and butter in a small saucepan until steaming, pour over chocolate chips in a bowl, and let them sit for two minutes before stirring. The gentle heat melts the chocolate smoothly without scorching it, creating something glossy and pourable.
- Finish and Set:
- Pour ganache over the cake and spread it evenly with a spatula, working quickly before it starts to cool and thicken. Refrigerate at least 30 minutes so the ganache sets into that snappy shell you crack through on the first bite.
 Save
Save The moment my son came home from school and asked if that was the cake I'd made—actually seemed disappointed it wasn't already time for dessert—that's when I realized this recipe had become part of our family identity. Every celebration now includes someone saying they hope I'm making the Ho Ho Cake, and there's no higher compliment than that.
Why This Cake Works Every Time
The ratio of butter to sugar to eggs creates a cake that stays tender through cooling and doesn't dry out over several days, which is the opposite of most sheet cakes that turn to crumbs by day two. The alternating method of wet and dry ingredients is old-fashioned baking wisdom that actually makes a difference—it keeps the gluten relaxed and prevents that dense, tight crumb that comes from overworking the batter. When you combine a moist cake base with a filling that's half butter (for richness) and half whipped cream (for lightness), you get something that feels special without needing to be complicated.
Making It Ahead and Keeping It Fresh
You can bake the cake layers a day or two in advance and store them covered at room temperature, which actually lets them firm up so they're easier to slice and layer. The filling and ganache are best made the day of assembly since the whipped cream won't hold stiff peaks longer than that, but the assembled cake keeps beautifully in the refrigerator for up to three days. People often ask if the cream gets weird or the ganache gets tacky, and the answer is no—if anything, the flavors marry and it tastes even richer by day two.
Variations and Twists You Can Try
If you want to lighten the filling, swap the whipped cream for marshmallow fluff, which sounds different but tastes like a childhood memory and works surprisingly well with the chocolate ganache. You could also add a tablespoon of instant espresso powder to the ganache if you want to deepen the chocolate flavor and appeal to the coffee lovers in your life. A splash of almond or peppermint extract in the filling turns this into something new without requiring you to learn a completely different recipe.
- Pair this with strong coffee or cold milk for a classic dessert combination that feels right no matter the season.
- Serve it at room temperature for about 20 minutes after pulling from the fridge so the cream filling is soft but the ganache is still set.
- If you have leftovers, slice them individually and freeze them between parchment paper—they thaw perfectly for those moments when you need comfort food fast.
 Save
Save This cake has become more than just dessert in our house—it's become the thing I make when I want to say I'm thinking about someone without needing words. Every bite is tender, every layer tells a story of time taken and care given, and that's the real magic of it.
Recipe FAQs
- → What type of flour works best for the yellow cake?
All-purpose flour provides the right balance of structure and tenderness for this yellow cake.
- → How can I achieve a fluffy vanilla cream filling?
Whip cold heavy cream with vanilla and a pinch of salt until stiff peaks form, then gently fold into the butter and powdered sugar mixture for a light texture.
- → What’s the best way to make smooth chocolate ganache?
Heat cream and butter until just simmering, pour over chocolate chips, let sit briefly, then stir gently until smooth and glossy.
- → Can the cake be made ahead of time?
Yes, it can be assembled and refrigerated for up to 3 days to allow flavors to meld perfectly.
- → What tools are essential for assembling this dessert?
A serrated knife for even layers, mixing bowls, an electric mixer for the filling, and a saucepan for the ganache are key.